Prefix registration
Jump to navigation
Jump to search
To create a Prefix, see the following steps:
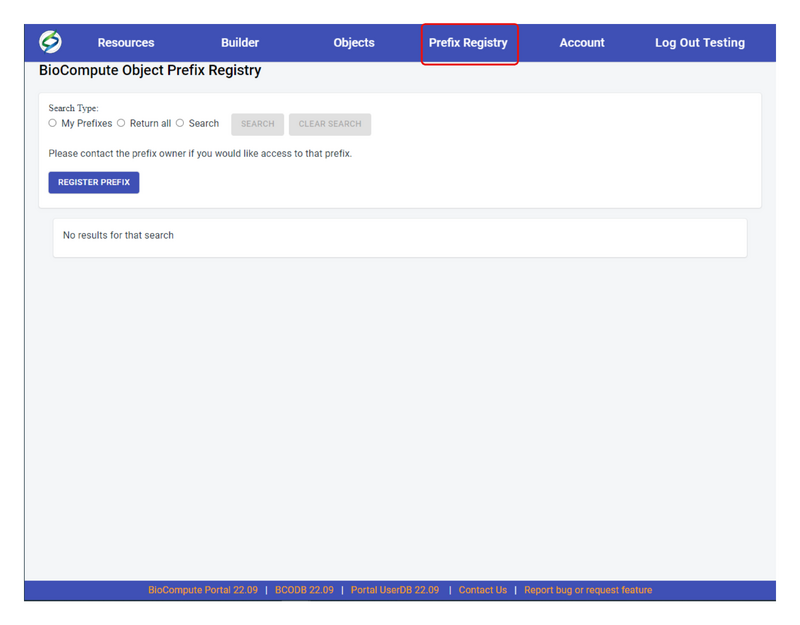
- Go to Prefix Registry on the header
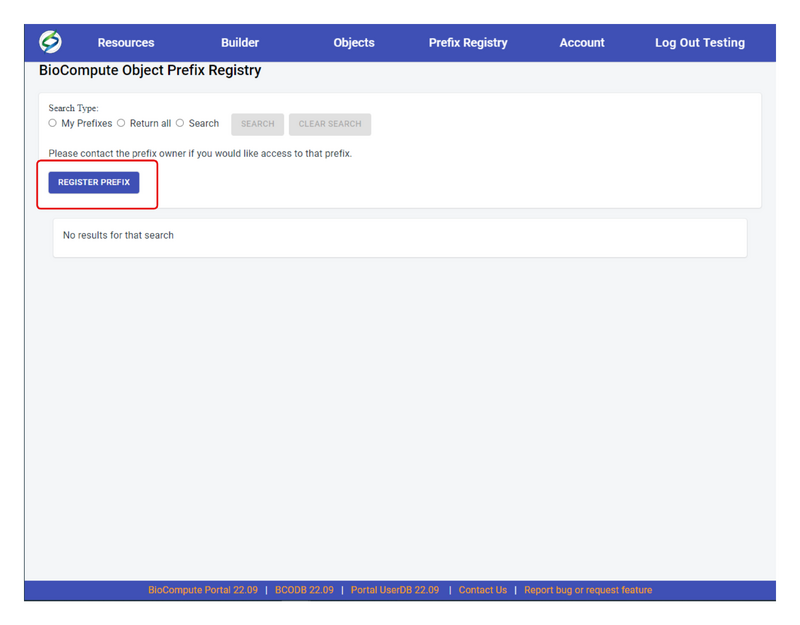
- Click on REGISTER PREFIX
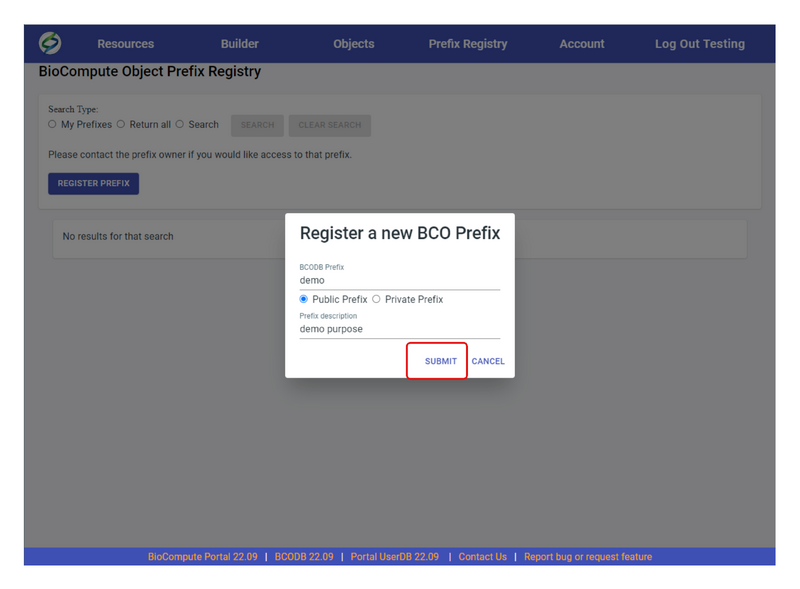
- A Register a new BCO Prefix window will pop up. Enter the BCODB Prefix name (5 character limitation), choose either Public Prefix or Private Prefix, add Prefix description in the field. An example is shown in the figure below, then click on SUBMIT.
- A message will show up to indicate if the prefix is registered successfully or failed. If failed, this can cause by duplicate prefix names or others. Please contact us directly if registration fails. If registered successfully, click on ok.
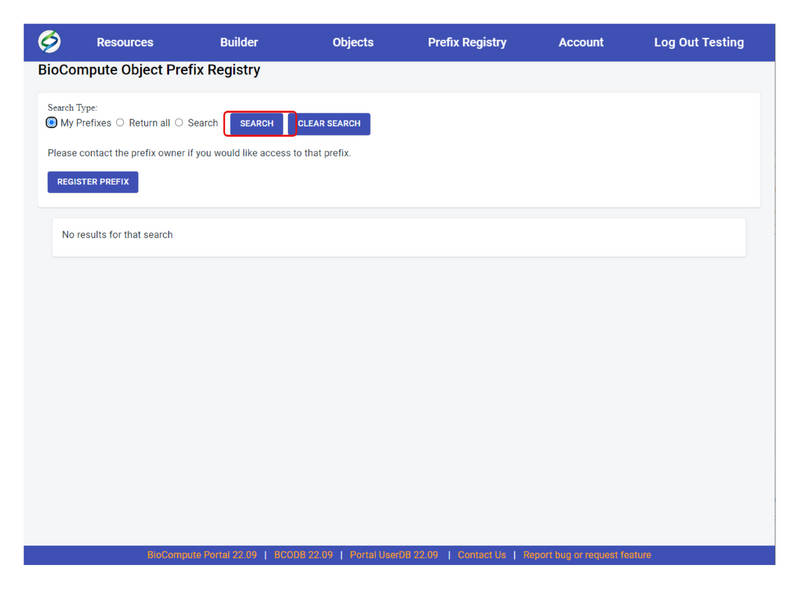
- To verify the prefix was registered successfully, go to Prefix Registry, under Search Type, select either My Prefixes to search prefix you created under this account or Return all to search for all existing prefixes.
- In the prefix search results, only the prefixes owned by you are clickable. By clicking on any of them, it will direct you to the Account page in order to modify permissions for this prefix and groups under this prefix.
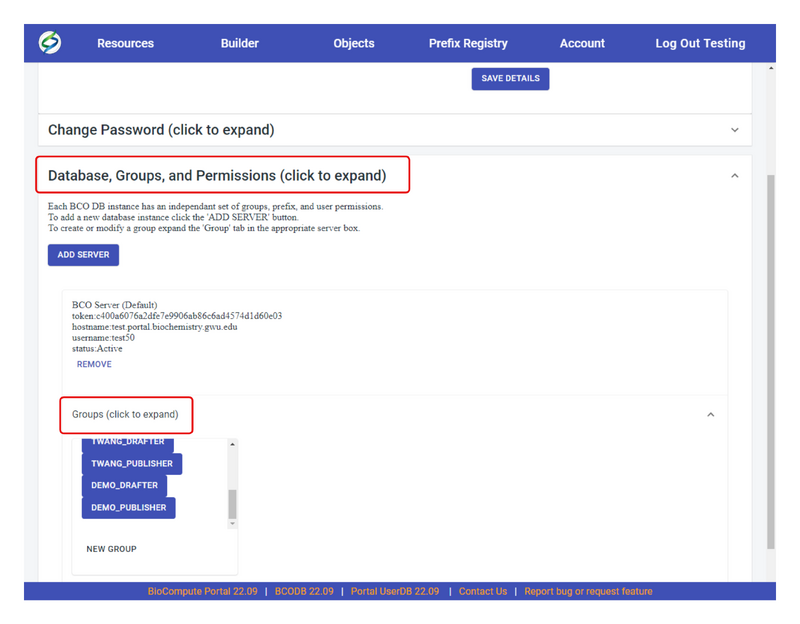
- If modifications are needed to a prefix, click on the prefix from previous step which will direct to the account page. Click Database, Groups, and Permissions, then Groups.
